Welcome

Thanks for visiting my Blog. Whether your visit is to check up on my progress, or maybe compare what I'm doing with a similar project you'r undertaking, welcome. Have a look around and leave comments if you would like to.

Monday, May 31, 2010

Gas Installed, Radios Fitted, Table Fixed

Back after a break and now with only two weekends left before the big trip to the mainland.  One of the major things that had to be done was the gas fitting.  The gas box was installed several months ago and I've been looking for someone to do the gas fitting and issue the safety certificate.  All done now though.  Not cheap however, $700.00 to install the regulator, and pipes to each of the cooktop and the hot water system.  To say I was shocked at the price is an understatement.  Anyway it had to be done and I guess that's what gas fitters charge these days.

The pic below is of the gas box door which I installed last weekend.  I had a few issues with making it fit and had to cut the door down with the angle grinder. The sticker on the box cover was $9.80, what a rip off.


Being a Ham Radio nut, it was essential that I had not only the UHF CB installed, but also the 2 metre/70 centimetre transceriver.  The radios were always intemded to be installed on the shelf over the cab, but the issue was always where the antennas would be mounted.  The answer was to use gutter mounts.  I found the mounts at http://www.andrewscom.com.au/ for $19.00 each.

Before I could install the VHF/UHF rig, I needed to run 15amp power cables from the battery of the bus.  To do this I installed 2 heavy cables from the battery to a distribution board under the small cupboard behind the passenger's seat. I also added a double cigarette lighter socket for things likr phone chargers, TV etc. ($12.00 from www.jaycar.com.au )


The following pics show the radios installed on the shelf and the antenna mounts on the front of the motorhome.


The pic below shows the UHF CB antenna on the gutter mount.
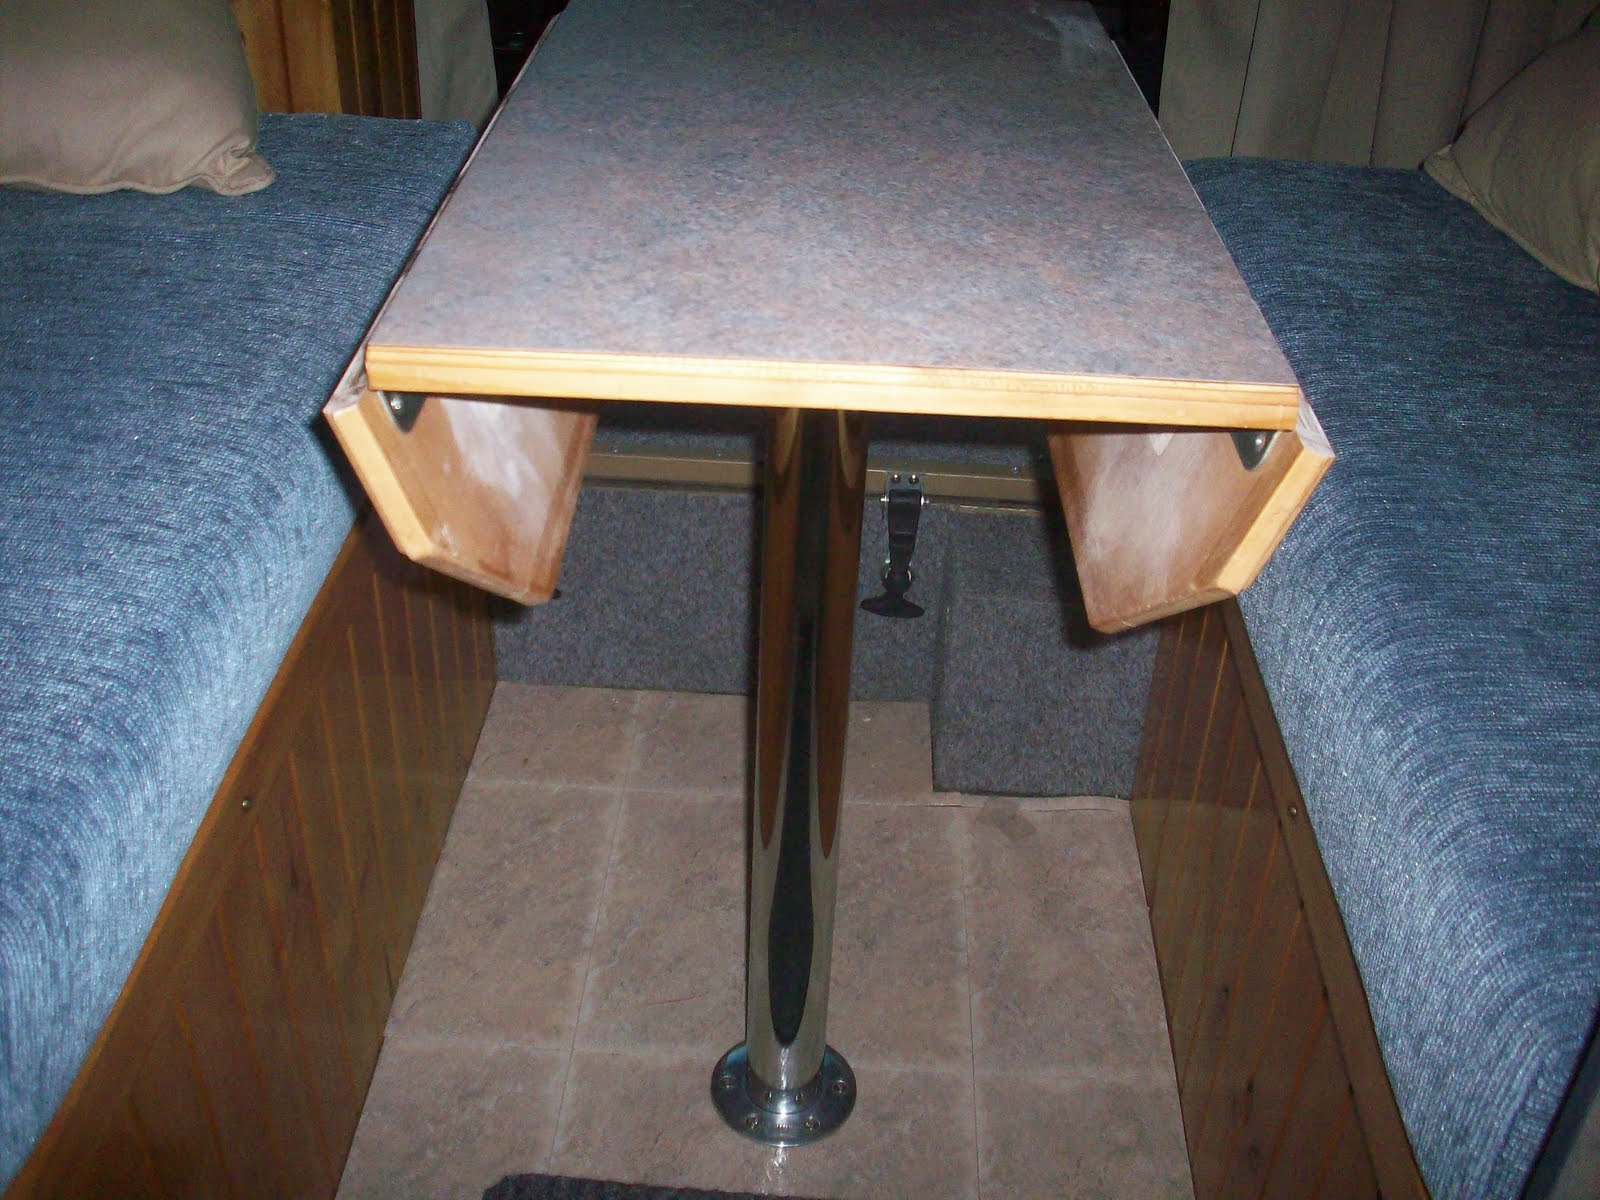

The Table

My original plans for the table didn't work out the way I's hoped.  Put simply the table was too low and the drop down wings on it were way too long.  It was impossible to sit at the table comfortably, so I had to shorten the wings.  The pics below show the 'new' modified table with the wings down and raised.


Now I have to finish lining the shower, and by the way, the seats are at the motor trimmers being completely overhauled, new padding, reshaping and recovering.  I've been promised big things, we'll see later in the week.

Sunday, May 9, 2010

The House Battery and Mains Systems All Done

I remembered this week that I had not posted any pics of the house battery.  There was a fair bit of agonising over which battery to install.

I really wanted to have the house battery under the dinette seat behind the driver because of the ease of wiring and access.  The problem is that having batteries that are not completely sealed means that hydrogen gas can be generated while the battery is charging.  Hydrogen is of course highly flammable and having a build up of it in a confined space is asking for trouble.

For this reason,  I was heading for 'Gel' cells or Absorbed Glass Mat batteries (AGM) rather than the traditional wet cell deep cycle batteries which need to topped up and are vented through the caps.  The cost of the Gel batteries was huge in the size that I wanted (200A/Hr).

Finally this battery was suggested as an alternative.  It is a traditional lead acid battery,  however it is sealed and maintenace free, and instead of venting though the caps,  any build up of gasses is vented through two small vents, one on either side of the battery.

The pics below show the battery and how I used irrigation fittings and clamps to vent the battery to the outside of the bus through the floor.  This has worked out just fine.  The only thing to do now is to clamp the battery down to the floor.  This thing is HEAVY.  I did my back in trying to shift it myself.  This is 200A/Hr deep cycle battery from Marshall Batteries in Hobart for $240.00.


This pic shows the vents where they go through the floor.  It's still messy in there,  must clean it up.

The 240 volt mains system has been waiting for months to be installed.  I just could not find an electrician who was interested in doing the job.  I guess it was quite small and they are really busy at the moment.  Anyway, its done.  Pics following are of the Double Pole outlets, one on each end of the kitchen bench and one in the back of the cupboard under the sink to run the power supply for the fridge and the battery charger.

The last pic shows the mandatory earth leakage detector inside the kitchen cupboard.  A very neat job done by Leigh from VanDeiman Electrical in Hobart  Phone 0418 121 489.  Guess what,  they even cleaned up their mess before they left.  I just have to wait for the certification to come back from Aurora Energy so that I can send it to the insurance company.


There was one other small job that I did get done this weekend too,  that was the cup holder/tray to go on the engine box to hold drinks and maps etc.  Pic below.


Shower Lining Started

Hi Again.  Well the lining of the shower with ply was completed this weekend.  The whole job has been on hold for months waiting to get the mains electrical install done.  With that job done, I got to work putting plywood onto the remaining walls to support the plastic sheeting which will waterproof the shower/toilet.  The following pic will give an idea of how it looks at this stage. All of the plywood is in,  just got the cut the plastic to size and glue to the ply.


The other job that I got done this weekend was to finally get all of the curtains up and working properly. I was intending to have a venetian blind made for the windows behind the kitchen bench,  but was talked out of it because they rattle when you're driving apparently.  I had curtains made,  so I decided to make use of them.

Sorry about the mess.  As you can see,  work is still in progress  I have been doing all of those little jobs that need to be done so I can say the job is finally finished. A post on the mains and 12 volt systems now that they are all done is next.

Saturday, May 1, 2010

The Kitchen Drawer, The Shelf in the Cab and the New Stereo

I've been putting this one off for some time because I've never used drawer runners before.  First off I had to make the drawer itself.  This wasn't too bad.  I made the bottom out of 13mm ply and the sides out of 7mm ply, glueing and nailing all of the sides.  Because I hadn't done this before,  I made the drawer too high and couldn't get the thing into place.  A quick bit of work with the jig saw fixed that though.  I had some throuble with getting the runners straight,  but sorted that after some mucking around.  The pic below shows the finished job with the front panel I made months ago fitted in place.


The pic above shows how I had to build out the side of the draw to leave a gap. This is so that it leaves room on both sides at the top for the catches.


The pic above shows the finished job.  All looks good I think.

The next job was to build and install a shelf over the top of the dashboard to house some new speakers.  The ones in the back of the bus can't be heard from the driver's seat.  The other reason is to make a shelf for the UHF CB transceiver to go onto as well as maps, books etc.

I made the shelf out of ply and a piece or masonite that I found at the dump.  Waste no want not.  The pic below gives an idea of what it looked like when the woodwork was finished.


You can see that I have used the small metal angles inside the boxes at each end to screw it to the panel above the dashboard.

The pic below shows the shelf covered in carpet and fixed into position.  You can see the new speakers mounted in the boxes in the shelf.  The pieces of ply that the speakers are mounted on are removeable and covered in carpet separately. The black conduit running down the left side has the speaker cables and a power cable for the UHF radio in it. This has got to be fixed back out of the way into the corner near the windscreen.


The pic below is of the new stereo which was installed today.  It is a Kenwood with an Aux unput which was on special at AutoBarn for $88.00.  It has been installed with the existing speakers connected as well and it sounds really good.  A good days work.  More tomorrow.  The blank plate and the bracket are for the Yaesu FT-857 transceiver face plate.

Another Test Trip

Another trip away to test things out, mainly how the solar panels and the battery would cope with the fridge and lights.  The good news is that it all worked just fine and the panels kept the battery over 12 volts for the whole weekend.  I took the pic below of the camp, just for the record.


What the trip did do was allow me to make a list of things that I want to add, and jobs that I want to do before the big trip in June.  On Sunday, I took Ben to the Berry farm for a treat before we left to come home.  The pic below is the motorhome parked there.


The jobs start now in earnest before the big trip,